Final Project Initial Prototyping and Playtesting: Invisible Orchestra

For our final project, Hayk and I were inspired by a classic Penn and Teller project:
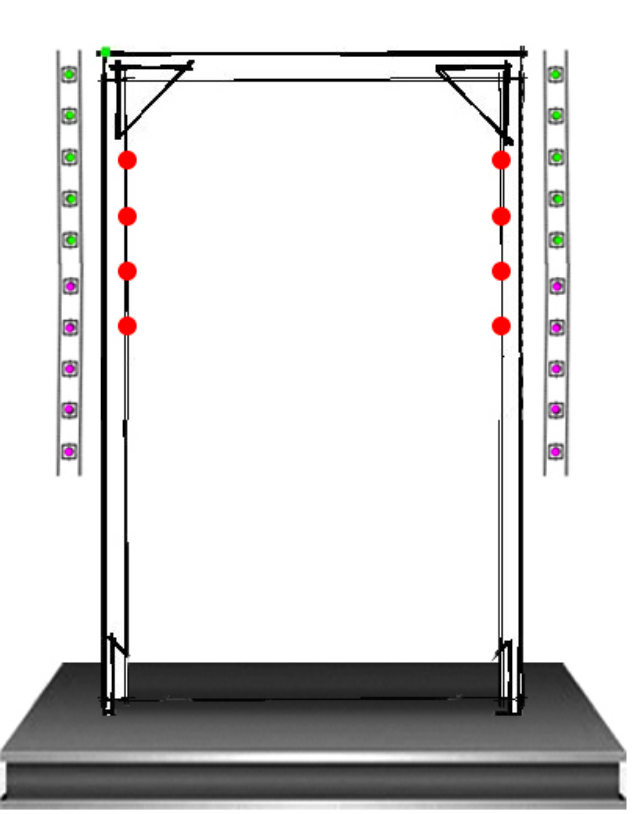
We knew that we wanted to play with air, sound and light, and tossed around a few ideas based on that. We considered a theremin, an air keyboard, and other variations on those themes. After bringing our ideas into class, we came up with a refined idea: the “Invisible Orchestra”. We wanted to create a gamified instrument: one player conducts, the other plays an air instrument. The conductor’s actions will light up an LED on a frame, which the player, inside the frame, has to motion towards in order to play a note.
We set up a prototype for playtesting, which you can see (but not really hear) below.
Basically, one player moves their hand along a line as the “conductor”, which illuminates an area of an LED strip, and the other player moves their hand to follow them, which produces a note.
We took this in for playtesting last Wednesday and got some extremely helpful feedback: we want to add more colors to the LED strip (which should be fairly easy), allow for continuous movement (basically sweeping the keys), and variation of instrument/note/sound.
After that, we met with Danny to discuss our primary concern: how to best build the “conducting” side of the game. We’re going to test out using p5 color tracking on a colorful wand to see how that works, and may adjust to use kinect pose tracking if that proves too difficult. We’re also still trying to figure out the degree to which we’d like this to be a game vs. an instrument/performance technology — once we’ve built a functional prototype, we plan to do more playtesting to decide what gets the best reception.
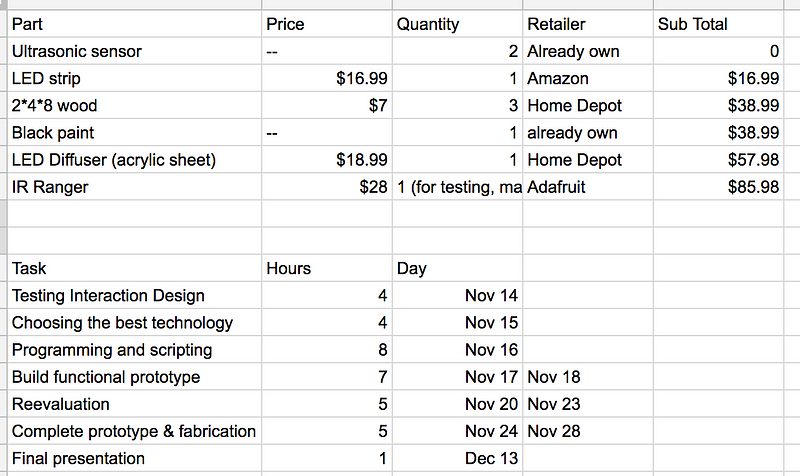
We also built out an initial bill of materials, which you can see below, although we’ll likely update as we go through the prototyping and fabricating process.

Next Steps:
- Testing different sensors
- Setting up different instruments
- Setting up color tracking with p5
- Building a basic frame